Programming the Arduino
04/01/2021
(this is only "Getting started")
First: Any CPU or Controller is as dumb as a post until you tell it what to do, and even then it is an "Idiot Savant " (most controllers are not "Plug & Play")
Second: The Programmer and the Controller have to speak the same language (Proper "Syntax")
The actual code is initially simply text descriptions of desired actions, and the Compiler is a program that converts the text into machine code for the Controller
Every programmer has their own style and approach to a project at hand.
That style may change somewhat depending on the type of project, and even the language in use.
Every Language has its individual "Nuances", which is a nice way of describing the rules and requirements.
There are however, certain principles which should be considered for anyone new to programming.
- "Linear Programming" should be avoided, except at the very beginning of a project.
- "Modular Programming" should be employed
immediately afterward:
- A "Module" consists of code for a specific task, that can be called on demand by any one place in a routine.
- There can be "Sub-Modules" that can be called independently or even by other "Modules".
- In-line Comments are very helpful throughout the process to assist in keeping your thoughts straight, and especially when even yourself comes back to a routine at a later date.
- Initial documentation at the top of the routine is good
practice:
- New, and additions to the routine (and date).
- Changes affected, problems (bugs) solved (and date).
- Results of interactions with shields or outside peripherals.
- Notes for "The next thing to try".
Programming Language
The common language for Arduinos is C and C++
Routines for the Arduino are called "Sketches", with the file type "xxxx.ino", and the Compiler expects them to be be in a folder by the same name.
Individual routines are basically in 4 major segments:
- Definitions
- Setup
- Run (by "loop"ing)
- Modules
User-written Modules are usually installed after the loop
// All modules require the void xxxxx and the braces { } to enclose the code
void HeatWater() // Calls the Module for Heating
void Wait(int 3) // Calls the Module Wait, with "3" as a passed parameter
Techniques
/* Comments */
// Comments (to end of line)
Definitions:
byte – int – float – boolean – String
Aid in trouble-shooting your Routine:
- Serial.begin(9600); //(allows comments to be echoed back to the Monitor)
- Serial.Print(" 'Value ' = "); // Print the text --
- Serial.Print(Value); // Print the value of "Value"
Operators:
- Difference between "=" and "=="
- && as "And", ++ as "OR"
- if(xxxx ) == HIGH // do not put a semi-colon here
- { ____ }
- while( ) == LOW
- { }
Pin Setup: { Tri-State / Bi-Directional Transceivers }
- pinMode (SW1, INPUT_PULLUP);
- pinMode(LED1, OUTPUT);
Actions: (Pin Controls)
- if (digitaRead(SW1) == LOW)
- digitalWrite(LED1, HIGH);
- delay(200); // delay 200 milliseconds
LCD Controls:
- #include <LiquidCrystal.h> // alert a system library
- ClearLCD();
- lcd.setCursor(col,row);
- lcd.print ("____");
- Kilroy(__LINE__); // Calls the "Kilroy was here" module for troubleshooting
Sample Sketches (Routines or Programs)
The old adage that says "give me an example:
There are a HUGE bunch of sample Routines (Sketches) included in the Arduino (IDE) Program.
Using the IDE, click on File > Examples > Built-in Examples
Sample Sketch #1: BLINK-RGB.ino - RGB_LED (Schematic), RGB Illustration [ Special, just for this group. A small breadboard, jumpers, and 330 ohm resistors required ]
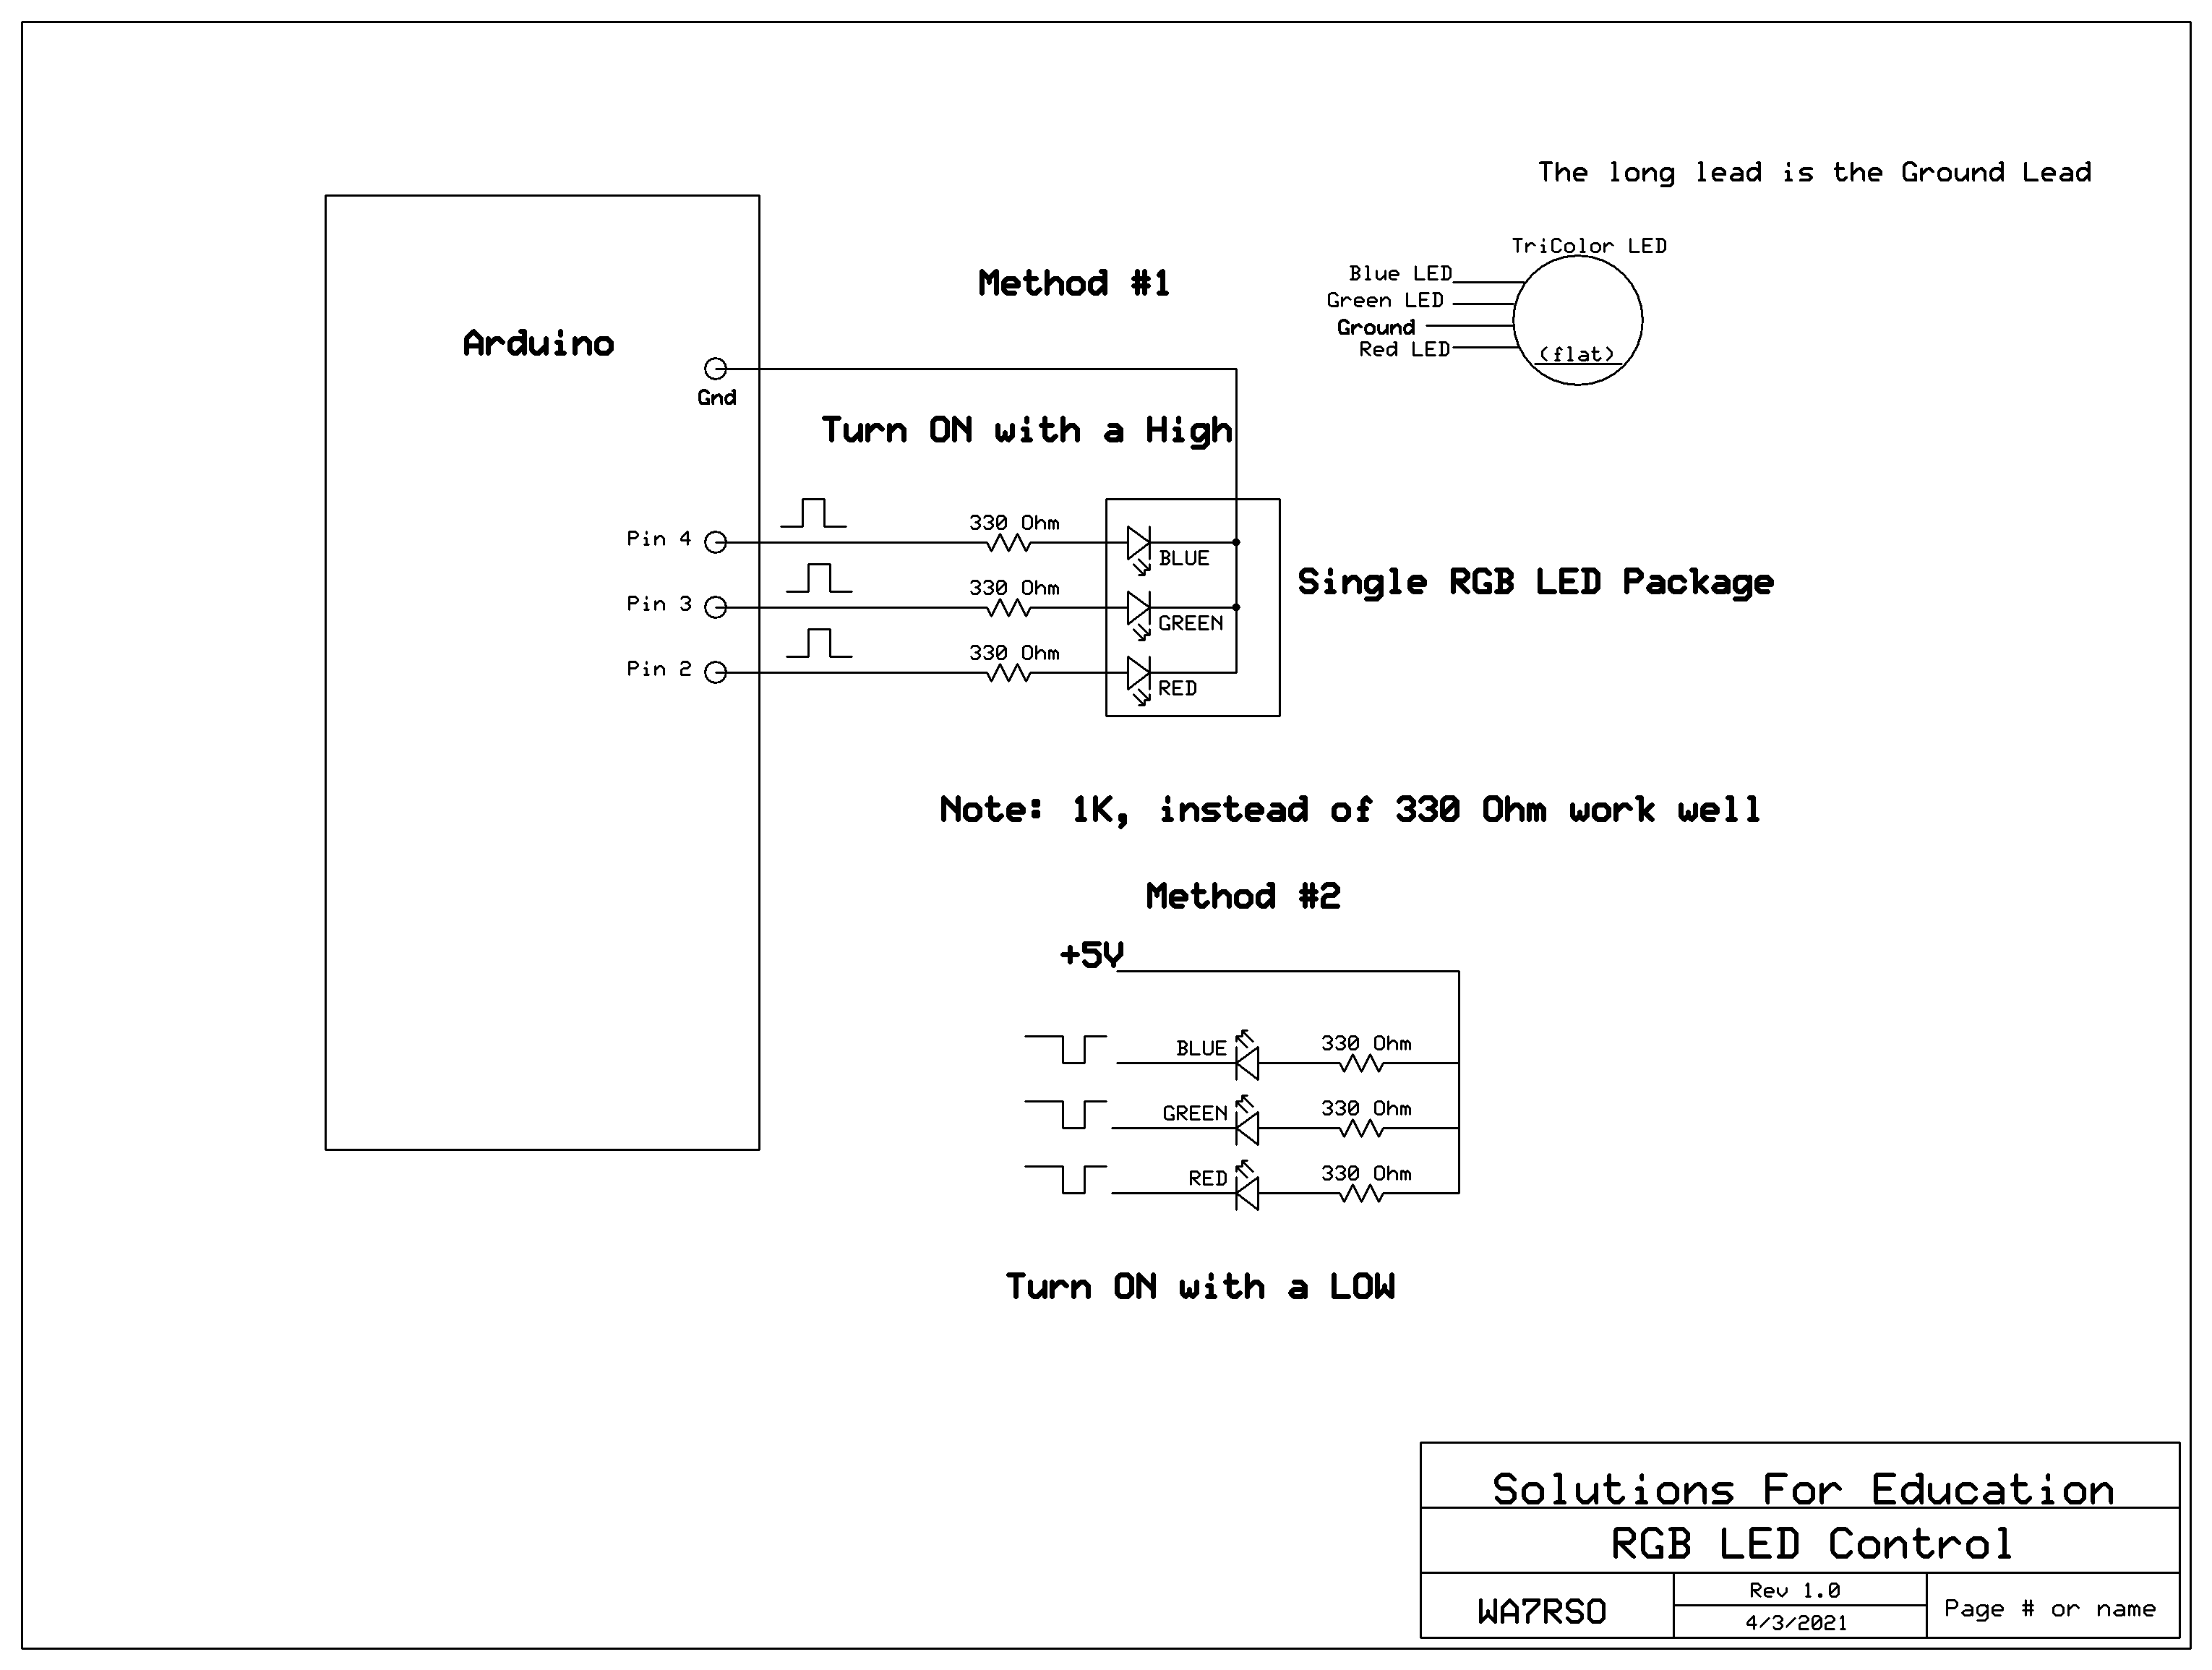
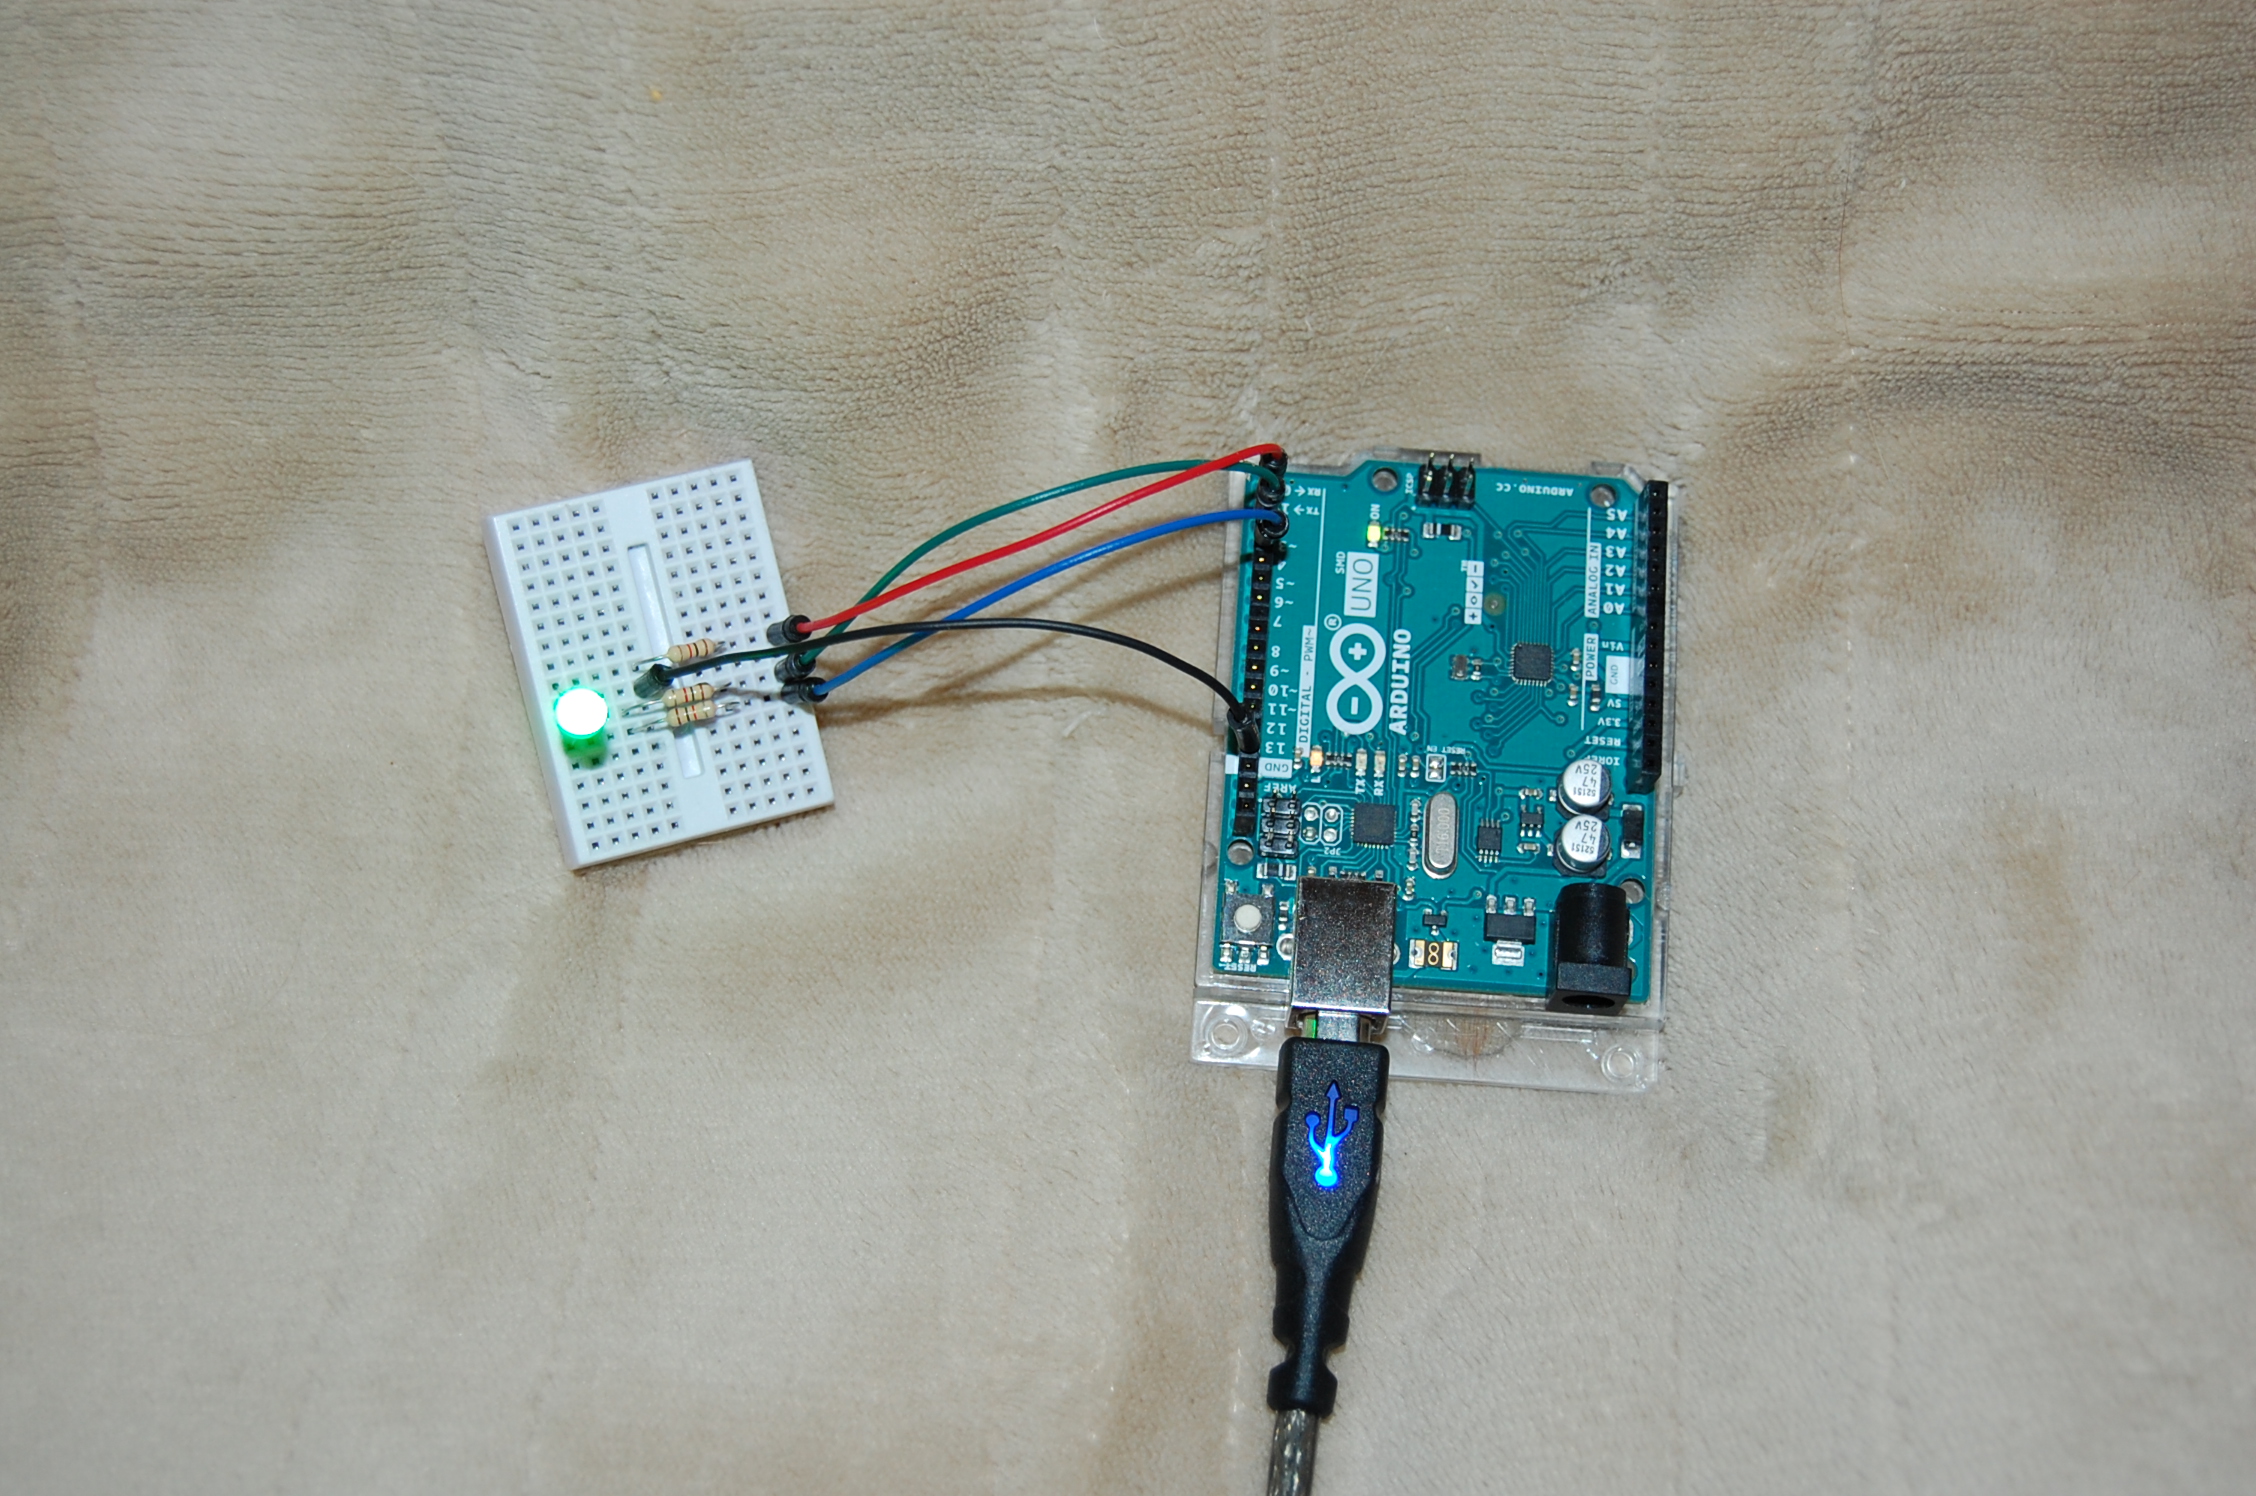
Sample Sketch #2: QST Project (the one that started it all for me)
Sample Sketch #3: Sequence_Relays (Seed Relay Shield – no LCD)
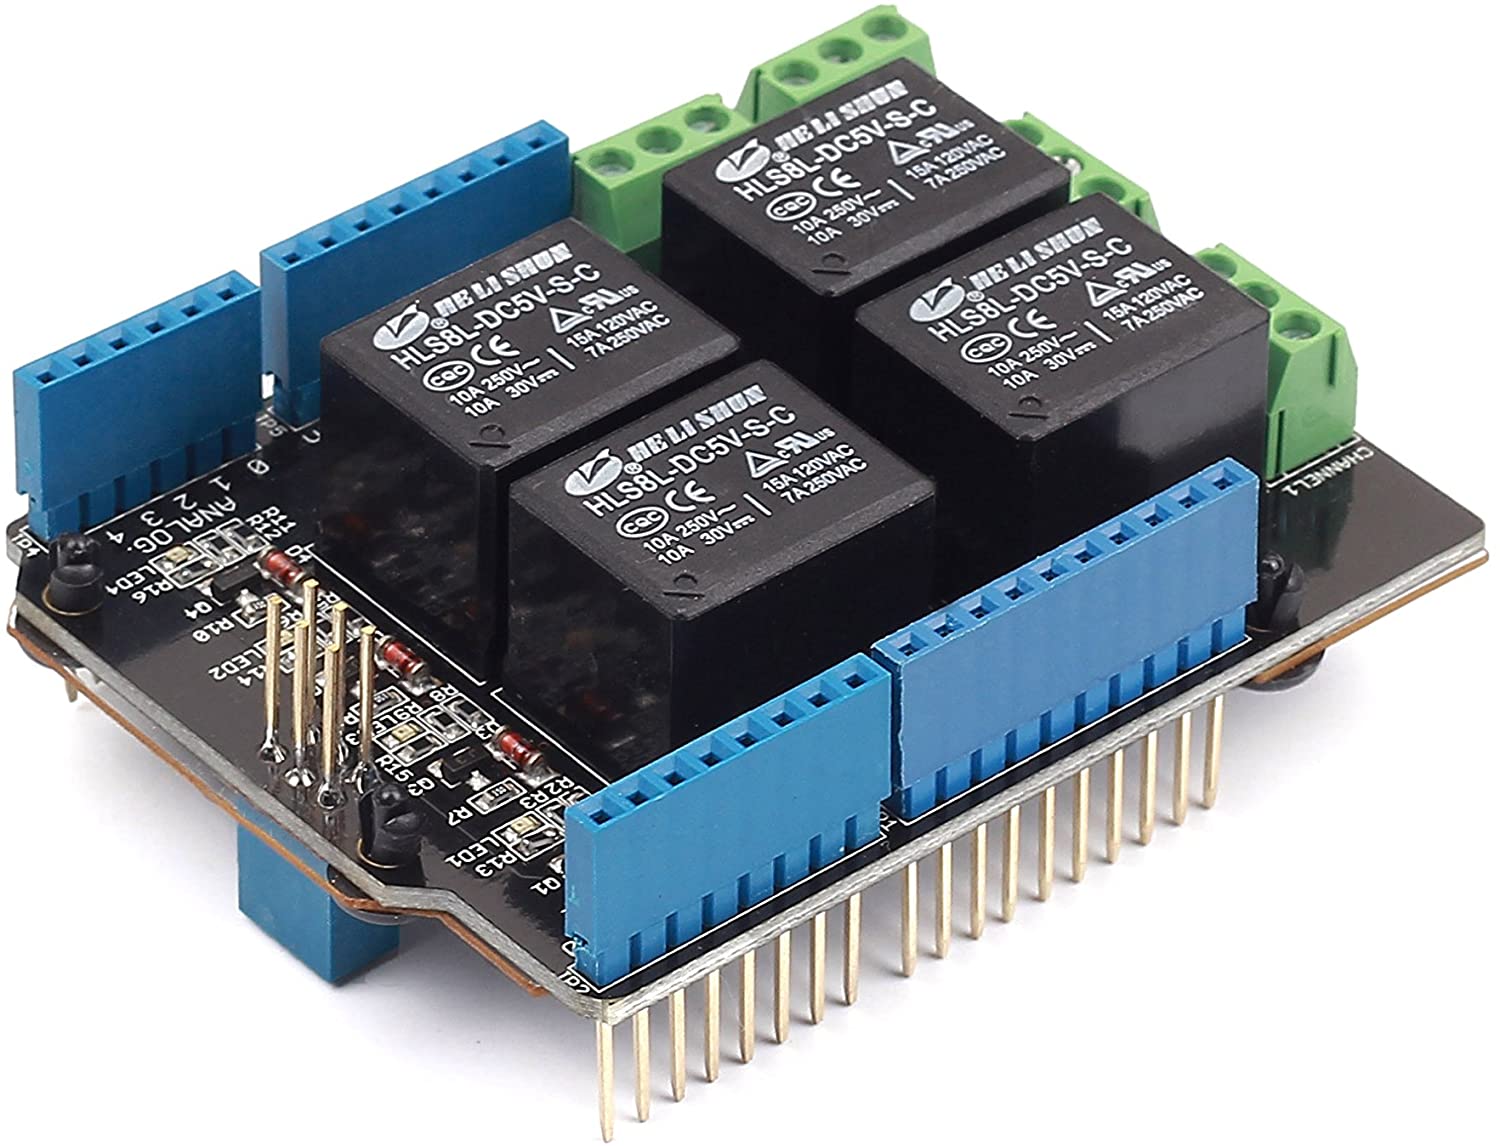
Sample Sketch #4: Furnace-Conrol (Custom Shield)
Sample Sketch #5: Ping_Pwang (Ultrasonic Transducers)
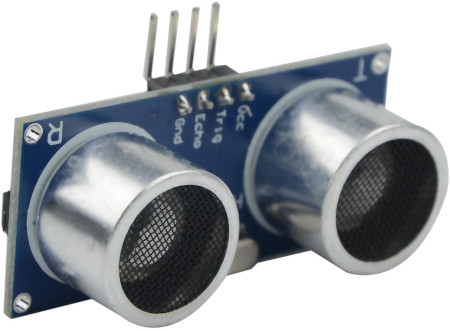
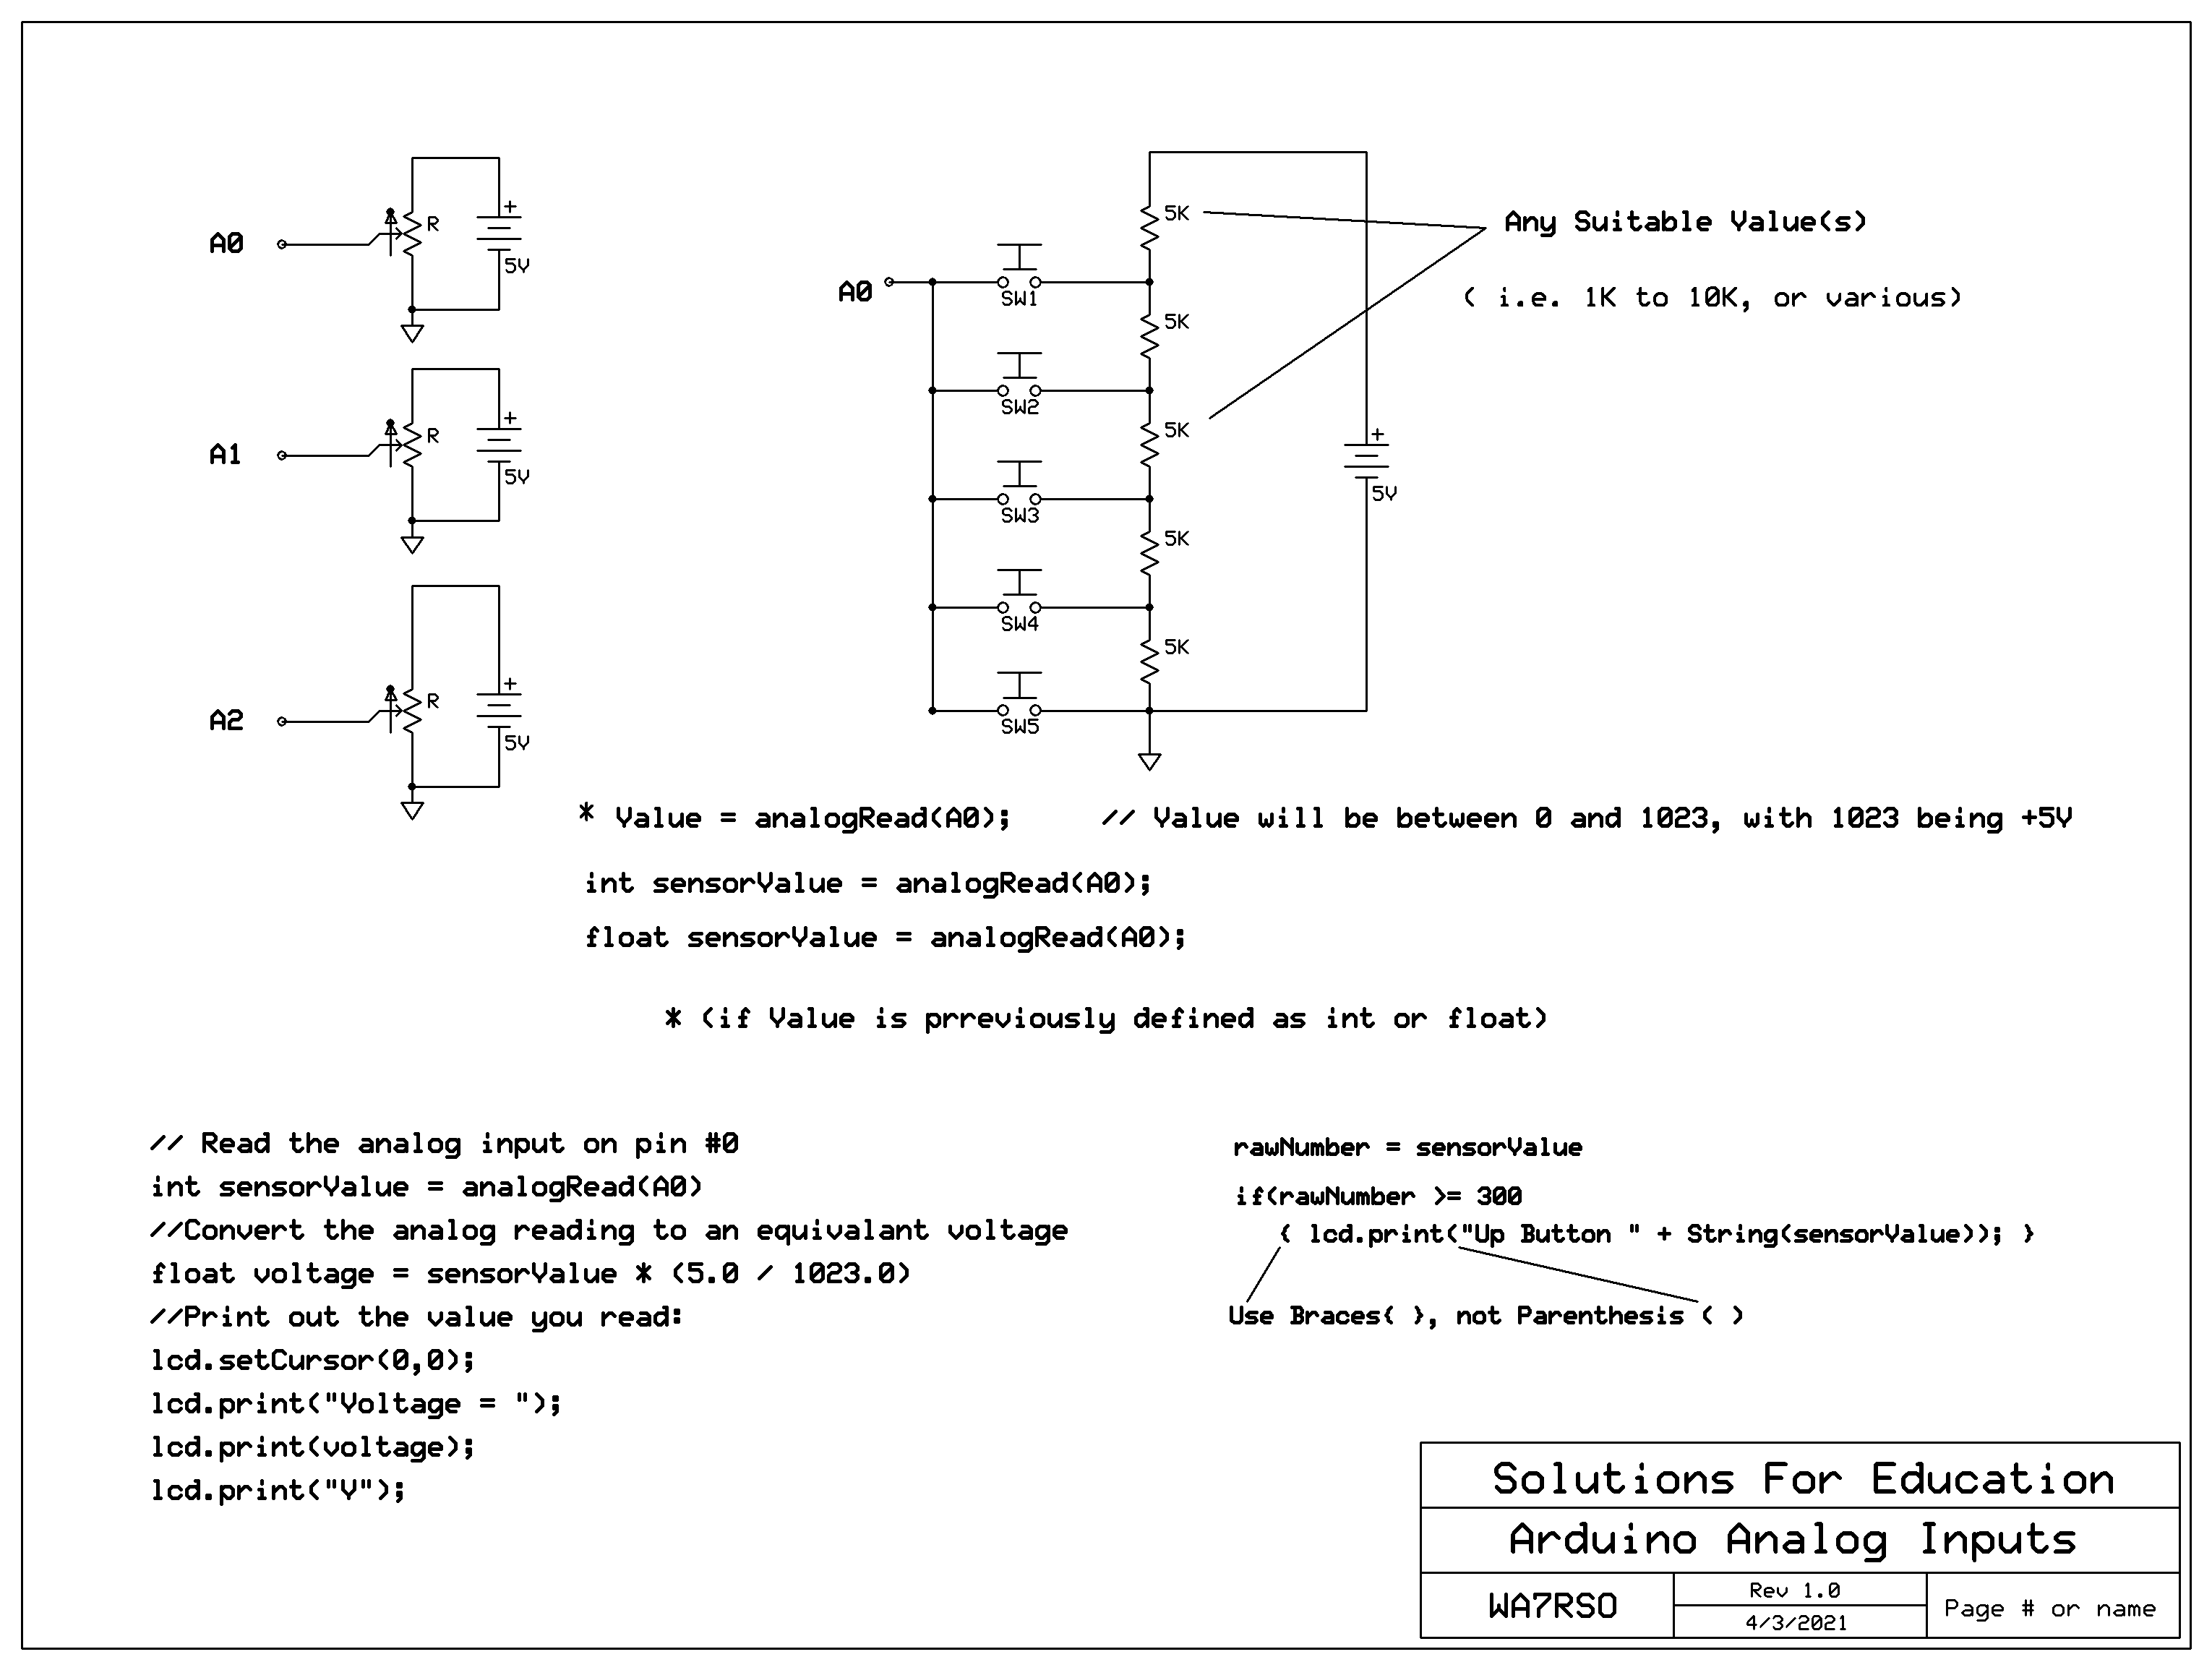
Sample Sketch #6: Key_Grab (PBs by Analog Input using voltage divider(s))
Downloaded Routines (Sketches) should have the file type ".ino" and be placed in a folder by the same name, without the file type.
The Arduino Compiler expects this.
In the IDE, you should:
- Run "Sketch > Verify" before downloading to Arduino
- Then set "Tools > Port" and "Tools > Board" to make the correct assignments
- Then click on the Right Arrow (or "Sketch > Upload") to send to the Arduino
![]() Return to Arduino "Talking Points"
Return to Arduino "Talking Points"